

DIY barn quilt
In 2019, the Johnson-Brock TeamMates chapter found a way to have fun and raise money at the same time. Matches built, painted, and auctioned off barn quilts as a fundraiser for the chapter.
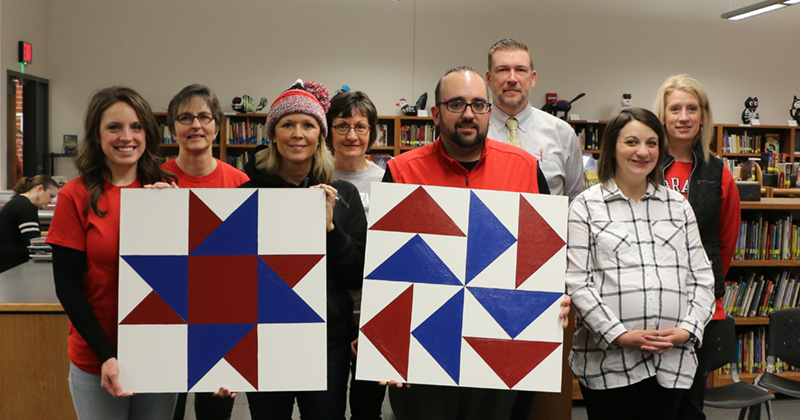
“Once we pull the tape off and they see the finished product, the kids love it,” Johnson-Brock TeamMates coordinator, Teresa Hahn said.
We asked the Johnson-Brock chapter how they made their barn quilts. Here’s what you need to get started:
- 1/2″ MDO plywood- cut to the size of your choice (square)
- Sandpaper
- Kilz Exterior Primer
- Paint-Latex Enamel
- Painter’s tape/White Eraser
- Pencil, yardstick, ruler, tape measurer
- Foam brushes, stir sticks, scissors
- Baggies to store wet brushes
Here’s what to do:
- Smooth edges of cut board with sandpaper
- Prime the board with Kilz. Apply two coats to the front, painting the cut edges each time. Turn and apply two coats to the back side, again painting the eges. This helps waterproof the board.
- Transfer the pattern. On the front of the primed board, draw lines with pencil. Do NOT use ink pens as they may bleed. Review your pattern and break it down into workable sections and draw the pattern onto the board.
- Mark the color of each section to be painted with Painter’s Tape.
- Turn the board over and run a strip of Painter’s Tape along the flag edge of the board BEFORE painting the front.
- Select the lightest color to paint first.
- Using the Painter’s Tape, tape off the area to be painted. As you apply the tape, press the edge at the paint line firmly down with your thumb. Where tape crosses, be sure to tape down firmly.
- Apply the paint in the same direction throughout the board. Be sure to cover the edges along the tape line completely. Pain the corresponding edge of the board at the same time. Store the wet brush in the baggie. Let the paint dry overnight.
- Apply the second coat. Each color needs to be painted two times as a sealing coat is not applied.
- After the second coat has dried, remove the Painter’s Tape. Pull tape up slowly and gently, running your thumb along the paint edge to be certain that it is sealed down tightly to the board.
- Proceed to the next color to be painted.
- When all colors have been painted and tape removed, check for bleeding and smudges. Touch up work as needed.
- Step back and enjoy your work of art!
To find a pattern, there are tons you can check out. Here’s one we suggest.